Custom Armor
FORMAT VERSION 1.26.30
This page assumes a basic understanding of custom items and attachables. Check out the items guide before starting!
Making custom armors is surprisingly easy to do, although you need to do a bit of fiddling around as there are a few files that need to be added and there can be a little bit of texturing involved.
Armor Textures
Each set of custom armor will need four textures for item icons, as well as three separate textures that will be applied to the armor model when worn.
The first armor model texture (named custom_1.png here) is applied to the helmet, chestplate and boots whereas the second texture (named custom_2.png here) is applied to the leggings.


You'll also need to add each item icon to the items texture atlas using the item_texture.json file:
{
    "texture_data": {
        "wiki:custom_helmet": {
            "textures": "textures/wiki/items/custom_helmet"
        },
        "wiki:custom_chestplate": {
            "textures": "textures/wiki/items/custom_chestplate"
        },
        "wiki:custom_leggings": {
            "textures": "textures/wiki/items/custom_leggings"
        },
        "wiki:custom_boots": {
            "textures": "textures/wiki/items/custom_boots"
        }
    }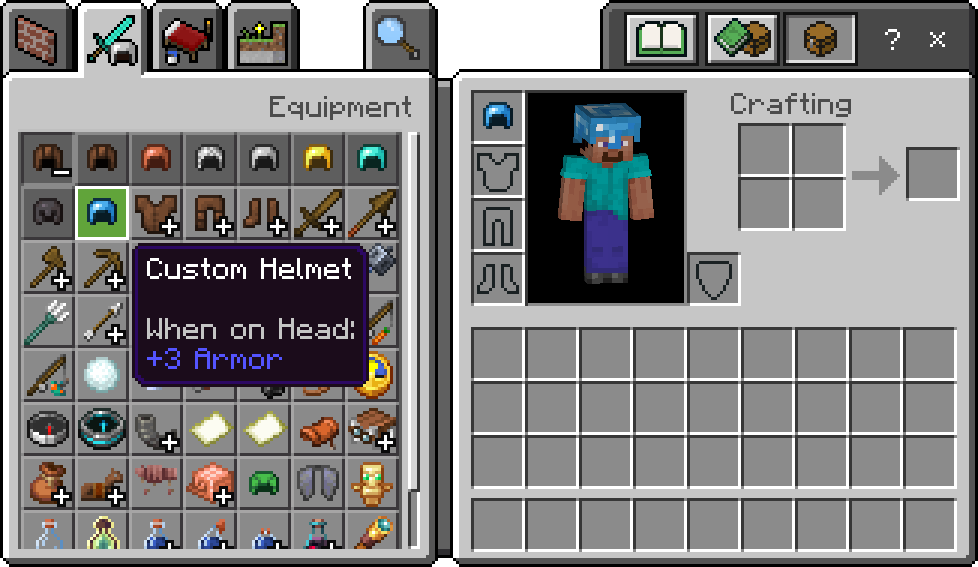
}Custom Helmet
Item JSON
{
    "format_version": "1.26.30",
    "minecraft:item": {
        "description": {
            "identifier": "wiki:custom_helmet",
            // Places the item into the "Helmets" group in the creative menu
            "menu_category": {
                "category": "equipment",
                "group": "minecraft:itemGroup.name.helmet"
            }
        },
        "components": {
            // Defines the texture from "item_texture.json" that will be displayed as the item's 2D icon
            "minecraft:icon": "wiki:custom_helmet",
            // Prevents the item from stacking with itself like vanilla armor
            "minecraft:max_stack_size": 1,
            // Allows the armor to receive enchantments specific to its type
            "minecraft:enchantable": {
                "slot": "armor_head",
                "value": 10
            },
            // Allows the item to be worn in the head slot, displaying the attachable defined in the RP
            "minecraft:wearable": {
                "slot": "slot.armor.head",
                "protection": 3
            },
            // Allows the item to take damage when worn
            "minecraft:durability": {
                "damage_chance": {
                    "min": 60,
                    "max": 100
                },
                "max_durability": 363
            },
            // Allows the item to be repaired after it has taken damage
            "minecraft:repairable": {
                "repair_items": [
                    {
                        "items": ["minecraft:stick"], // The items that can be used to repair this item
                        "repair_amount": "q.max_durability * 0.25" // Increases the durability by 25%
                    }
                ]
            },
            "minecraft:tags": {
                "tags": [
                    "minecraft:is_armor",
                    "minecraft:trimmable_armors" // Allows the armor to be trimmed in a Smithing Table
                ]
            }
        }
    }
}Attachable JSON
At this point your item would appear in-game and would be wearable but it would not have any appearance on the player's model.
This appearance can be achieved by using a feature known as attachables, which visually attach themselves to another entity based on its equipment. To start with, you'll need to create an attachables folder in your resource pack (you may already have one).
The attachable samples in this guide are largely based on the vanilla armor attachables, which have support for armor trims, enchantment glint and dedicated models for baby mobs.
{
    "format_version": "1.8.0",
    "minecraft:attachable": {
        "description": {
            "identifier": "wiki:custom_helmet",
            "materials": {
                "default": "armor",
                "enchanted": "armor_enchanted"
            },
            "textures": {
                "default": "textures/wiki/models/armor/custom_1",
                "enchanted": "textures/misc/enchanted_actor_glint",
                "baby": "textures/wiki/models/armor/custom_baby"
            },
            "geometry": {
                "default": "geometry.humanoid.armor.helmet",
                "baby": "geometry.humanoid.baby.armor.helmet"
            },
            "scripts": {
                // Prevents parts of the player's skin from sticking through the armor
                "parent_setup": "v.helmet_layer_visible = false;",
                "pre_animation": [
                    // Variable used by the render controller to determine whether the "baby" geometry and texture should be used
                    "v.use_baby_geo = q.is_baby && c.owning_entity->v.use_dedicated_baby_armor;"
                ]
            },
            "render_controllers": ["controller.render.armor.v2"]
        }
    }
}Item Name
Finally, let's define the name of our item by adding a translation in the resource pack in the form item.<identifier>=<name>.
item.wiki:custom_helmet=Custom HelmetIf you now go into the game and check what you have produced you should be able to wear your helmet and pat yourself on the back for a job well done.
Custom Chestplate
Item JSON
{
    "format_version": "1.26.30",
    "minecraft:item": {
        "description": {
            "identifier": "wiki:custom_chestplate",
            // Places the item into the "Chestplates" group in the creative menu
            "menu_category": {
                "category": "equipment",
                "group": "minecraft:itemGroup.name.chestplate"
            }
        },
        "components": {
            // Defines the texture from "item_texture.json" that will be displayed as the item's 2D icon
            "minecraft:icon": "wiki:custom_chestplate",
            // Prevents the item from stacking with itself like vanilla armor
            "minecraft:max_stack_size": 1,
            // Allows the armor to receive enchantments specific to its type
            "minecraft:enchantable": {
                "slot": "armor_torso",
                "value": 10
            },
            // Allows the item to be worn in the chest slot, displaying the attachable defined in the RP
            "minecraft:wearable": {
                "slot": "slot.armor.chest",
                "protection": 8
            },
            // Allows the item to take damage when worn
            "minecraft:durability": {
                "damage_chance": {
                    "min": 60,
                    "max": 100
                },
                "max_durability": 528
            },
            // Allows the item to be repaired after it has taken damage
            "minecraft:repairable": {
                "repair_items": [
                    {
                        "items": ["minecraft:stick"], // The items that can be used to repair this item
                        "repair_amount": "q.max_durability * 0.25" // Increases the durability by 25%
                    }
                ]
            },
            "minecraft:tags": {
                "tags": [
                    "minecraft:is_armor",
                    "minecraft:trimmable_armors" // Allows the armor to be trimmed in a Smithing Table
                ]
            }
        }
    }
}Attachable JSON
{
    "format_version": "1.8.0",
    "minecraft:attachable": {
        "description": {
            "identifier": "wiki:custom_chestplate",
            "materials": {
                "default": "armor",
                "enchanted": "armor_enchanted"
            },
            "textures": {
                "default": "textures/wiki/models/armor/custom_1",
                "enchanted": "textures/misc/enchanted_actor_glint",
                "baby": "textures/wiki/models/armor/custom_baby"
            },
            "geometry": {
                "default": "geometry.humanoid.armor.chestplate",
                "baby": "geometry.humanoid.baby.armor.chestplate"
            },
            "scripts": {
                // Prevents parts of the player's skin from sticking through the armor
                "parent_setup": "v.chest_layer_visible = false;",
                "pre_animation": [
                    // Variable used by the render controller to determine whether the "baby" geometry and texture should be used
                    "v.use_baby_geo = q.is_baby && c.owning_entity->v.use_dedicated_baby_armor;"
                ]
            },
            "render_controllers": ["controller.render.armor.v2"]
        }
    }
}Item Name
item.wiki:custom_chestplate=Custom ChestplateCustom Leggings
Item JSON
{
    "format_version": "1.26.30",
    "minecraft:item": {
        "description": {
            "identifier": "wiki:custom_leggings",
            // Places the item into the "Leggings" group in the creative menu
            "menu_category": {
                "category": "equipment",
                "group": "minecraft:itemGroup.name.leggings"
            }
        },
        "components": {
            // Defines the texture from "item_texture.json" that will be displayed as the item's 2D icon
            "minecraft:icon": "wiki:custom_leggings",
            // Prevents the item from stacking with itself like vanilla armor
            "minecraft:max_stack_size": 1,
            // Allows the armor to receive enchantments specific to its type
            "minecraft:enchantable": {
                "slot": "armor_legs",
                "value": 10
            },
            // Allows the item to be worn in the legs slot, displaying the attachable defined in the RP
            "minecraft:wearable": {
                "slot": "slot.armor.legs",
                "protection": 6
            },
            // Allows the item to take damage when worn
            "minecraft:durability": {
                "damage_chance": {
                    "min": 60,
                    "max": 100
                },
                "max_durability": 495
            },
            // Allows the item to be repaired after it has taken damage
            "minecraft:repairable": {
                "repair_items": [
                    {
                        "items": ["minecraft:stick"], // The items that can be used to repair this item
                        "repair_amount": "q.max_durability * 0.25" // Increases the durability by 25%
                    }
                ]
            },
            "minecraft:tags": {
                "tags": [
                    "minecraft:is_armor",
                    "minecraft:trimmable_armors" // Allows the armor to be trimmed in a Smithing Table
                ]
            }
        }
    }
}Attachable JSON
{
    "format_version": "1.8.0",
    "minecraft:attachable": {
        "description": {
            "identifier": "wiki:custom_leggings",
            "materials": {
                "default": "armor",
                "enchanted": "armor_enchanted"
            },
            "textures": {
                "default": "textures/wiki/models/armor/custom_2",
                "enchanted": "textures/misc/enchanted_actor_glint",
                "baby": "textures/wiki/models/armor/custom_baby"
            },
            "geometry": {
                "default": "geometry.humanoid.armor.leggings",
                "baby": "geometry.humanoid.baby.armor.leggings"
            },
            "scripts": {
                // Prevents parts of the player's skin from sticking through the armor
                "parent_setup": "v.leg_layer_visible = false;",
                "pre_animation": [
                    // Variable used by the render controller to determine whether the "baby" geometry and texture should be used
                    "v.use_baby_geo = q.is_baby && c.owning_entity->v.use_dedicated_baby_armor;"
                ]
            },
            "render_controllers": ["controller.render.armor.v2"]
        }
    }
}Item Name
item.wiki:custom_leggings=Custom LeggingsCustom Boots
Item JSON
{
    "format_version": "1.26.30",
    "minecraft:item": {
        "description": {
            "identifier": "wiki:custom_boots",
            // Places the item into the "Boots" group in the creative menu
            "menu_category": {
                "category": "equipment",
                "group": "minecraft:itemGroup.name.boots"
            }
        },
        "components": {
            // Defines the texture from "item_texture.json" that will be displayed as the item's 2D icon
            "minecraft:icon": "wiki:custom_boots",
            // Prevents the item from stacking with itself like vanilla armor
            "minecraft:max_stack_size": 1,
            // Allows the armor to receive enchantments specific to its type
            "minecraft:enchantable": {
                "slot": "armor_feet",
                "value": 10
            },
            // Allows the item to be worn in the feet slot, displaying the attachable defined in the RP
            "minecraft:wearable": {
                "slot": "slot.armor.feet",
                "protection": 3
            },
            // Allows the item to take damage when worn
            "minecraft:durability": {
                "damage_chance": {
                    "min": 60,
                    "max": 100
                },
                "max_durability": 429
            },
            // Allows the item to be repaired after it has taken damage
            "minecraft:repairable": {
                "repair_items": [
                    {
                        "items": ["minecraft:stick"], // The items that can be used to repair this item
                        "repair_amount": "q.max_durability * 0.25" // Increases the durability by 25%
                    }
                ]
            },
            "minecraft:tags": {
                "tags": [
                    "minecraft:is_armor",
                    "minecraft:trimmable_armors" // Allows the armor to be trimmed in a Smithing Table
                ]
            }
        }
    }
}Attachable JSON
{
    "format_version": "1.8.0",
    "minecraft:attachable": {
        "description": {
            "identifier": "wiki:custom_boots",
            "materials": {
                "default": "armor",
                "enchanted": "armor_enchanted"
            },
            "textures": {
                "default": "textures/wiki/models/armor/custom_1",
                "enchanted": "textures/misc/enchanted_actor_glint",
                "baby": "textures/wiki/models/armor/custom_baby"
            },
            "geometry": {
                "default": "geometry.humanoid.armor.boots",
                "baby": "geometry.humanoid.baby.armor.boots"
            },
            "scripts": {
                // Prevents parts of the player's skin from sticking through the armor
                "parent_setup": "v.boot_layer_visible = false;",
                "pre_animation": [
                    // Variable used by the render controller to determine whether the "baby" geometry and texture should be used
                    "v.use_baby_geo = q.is_baby && c.owning_entity->v.use_dedicated_baby_armor;"
                ]
            },
            "render_controllers": ["controller.render.armor.v2"]
        }
    }
}Item Name
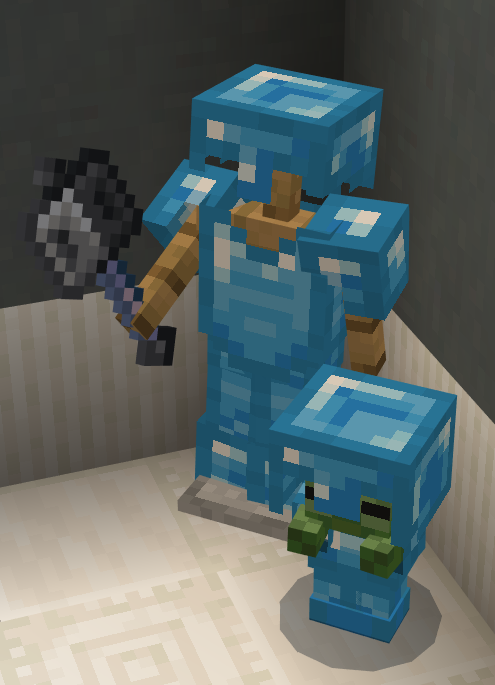
item.wiki:custom_boots=Custom BootsResult
That's it, you now have a whole suit of custom armor to swagger around in! You can use this as a basis to make whatever other armor you want in the game.
Bonus - Making Set Effects
This is a bit more advanced but lets say you want your custom armor to act like it's a set from an RPG game. We can add some code to check if we have the set equipped and do some great stuff with it.
Note that for effects you can use tick.json and functions with hasitem selector argument to avoid using player.json.
In this example we will just add a chance to teleport the attacker somewhere nearby and put a blurb on the console for flavour.
As we want this to trigger when the player is hit we need to add some logic to the player.json file. This is a huge file and we unfortunately need to make sure it has all the default content in there as well due to the way it will overwrite the default player components etc.
So rather than include the whole player.json I will just include the parts you will need to add to your components and events sections. If you have no idea what the player.json is then look in the vanilla behavior pack and look for it and just copy it over into your project.
So first of all lets put in the damage sensor component (which goes in your component section) which listens for when you take damage and lets you raise an event from it.
"minecraft:damage_sensor": {
    "triggers": {
        "on_damage": {
            "filters": {
                "all_of": [
                    {
                        "test": "has_equipment",
                        "subject": "self",
                        // Domain is the body part in this case
                        "domain": "head",
                        "operator": "==",
                        // The item identifier we want to check
                        "value": "wiki:custom_helm"
                    },
                    {
                        "test": "has_equipment",
                        "subject": "self",
                        "domain": "torso",
                        "operator": "==",
                        // Worth noting you can omit prefix for minecraft internal items i.e stick
                        "value": "wiki:custom_chest"
                    },
                    {
                        "test": "has_equipment",
                        "subject": "self",
                        "domain": "leg",
                        "operator": "==",
                        "value": "wiki:custom_leggings"
                    },
                    {
                        "test": "has_equipment",
                        "subject": "self",
                        "domain": "feet",
                        "operator": "==",
                        "value": "wiki:custom_boots"
                    }
                ]
            },
            // If all the triggers match in the filter raise the event
            "event": "wiki:armor_sets.custom.taken_damage"
        },
        // This means if it matches the check it still applies damage
        // Can be good to ignore team damage or similar scenarios
        "deals_damage": true
    }
}As you can see from the comments, there is a lot there but really all we are doing is listening out for something then making sure we only filter the results we care about then relay on an event.
The event can be called anything but it is often better to have it more specific, in case you end up having multiple similar events etc., also it can help finding if you have multiple sections to it, i.e. I could search for "armour_sets" and find all events related to it. Then once you are done, in the same file we decide what we want to do with the event, which we put into our events section.
"wiki:armor_sets.my_custom.taken_damage": {
    "randomize": [
        {
            "weight": 1,
            // We do a sequence here as we want to apply one command on one entity and the other on ourselves
            "sequence": [
                {
                    // This will take the attacker/other because it was in context at time of raising the event in the damage_sensor
                    "queue_command": {
                        // Teleport the entity away from us
                        "command": "spreadplayers ~~ 5 20 @s",
                        // Run the command on the attacker not us
                        "target": "other"
                    }
                },
                {
                    "queue_command": {
                        "command": "tellraw @s { \"rawtext\": [{ \"text\": \"§aYour armor glows and the enemy vanishes\" }] }"
                    }
                }
            ]
        },
        {
            // Dummy weighting so it happens semi frequently
            "weight": 20
        }
    ]
}Thats it, you can rejig the bits how you see fit but ultimately you have all the pieces to apply effects to armor and check for if you have the whole set applied or check for other equipment.
You can also change the equipment checks from self to other and check if whoever is attacking you has something equipped or even check if you are attacking a sort of block/entity and do different effects based on that. We haven't touched on that directly here but there is a good enough starting point to get you on your way and let you be creative with things.
Contributors


Text and image content on this page is licensed under the Creative Commons Attribution 4.0 International License
Code samples on this page are licensed under the MIT License